Did you know about 1.4 billion tons worth of produce gets wasted each year? And in the United States, we are responsible for wasting about 40 million tons – 80 billion pounds – every year, which is more than any other country on the planet! This may be a result of food spoiling before we’ve had the chance to cook with it, or it may be because we tend to not use up the entirety of the produce we do have. Think of all the lettuce and onion ends you’ve probably chopped off and then gone on to throw away? Everyone does it, but our hope is that we can reduce the amount of food waste, and one way to do that is through regrowing your produce.
Not only does regrowing your produce scraps allow you to reduce food waste, but it also contributes to a more self-sufficient future. While certain items, you’ll always want to pick up from the store or have consistently delivered to your home, others that you use the most often, you may want to give a try growing them on your own. Gardening is a form of self-care and is a hobby that promotes mindfulness and connectivity to nature. Once you are able to successfully grow something, you’ll learn more about nature’s growth cycles and you’ll be inspired to plant more, and probably even eat a more plant-based diet. What may start with simply regrowing fresh produce, may even find itself developing into a full-on gardening hobby.
Some benefits of gardening may include:
-helping your body fight off unwanted diseases
-building strength, particularly upper body as it is a form of exercise
-protecting your brain and improving cognitive functions such as memory
-boosting your mood naturally
-calming you down and bringing you to the present moment
Just as you can grow whole fruits and vegetables starting from their seeds, you can also utilize the ends of these foods to keep them going. That way you’ll be able to use them for many meals to come. In order to get started, you’ll need to gather some materials you’ll likely already have laying around the home. Now let’s jump right in!
Regrowing materials
First thing’s first, you are going to need to gather different produce scraps to regrow from. If you use a fresh produce delivery service like FarmboxRx, you likely have tons of excess scraps throughout the week. Gather up scraps from your onions, potatoes, leafy greens, and other veggies and set them aside until you are ready to work with them (hint: we recommend replanting shortly after creating the scrap.) Another benefit to having fresh veggies delivered to your door is that you’ll have a variety of food to choose from when it comes to your replanting desires.
Secondly, if you don’t already have gardening equipment, there are a few items you need to have on hand in order to successfully regrow your food. We recommend using an organic, pesticide-free potting or gardening soil. Different-sized pots and mason jars will also come in handy during the beginning sprouting stages of the veggies so make sure to have a few that you can dedicate to this project.
Now let’s jump right into how to regrow fresh produce from scraps. Be sure to try these methods out for yourself and give us a tag at @FarmboxRx and make sure to use the hashtag #FarmboxRx #FarmboxLiving so that we can see how they turn out!
What you need:
-Different edible plants to regrow from scraps such as onions, sweet potatoes, kale, celery, or herbs like cilantro, rosemary, or basil
-Potting or gardening soil
-Pots
-Mason jars or glassware
-Small garden shovel
-Toothpicks
- Sweet Potatoes
Place a sweet potato in a jar of water to begin growing the sprouts, also known as “slips.” Use two toothpicks to poke into the sides of the potato to prop it up in a small jar. Once they’ve grown to be at least 5 inches long, give the slips a good twist and then pull them out of the potato. Next you will want to plant the slips in the dirt about halfway down, and then watch as the slips continue to grow from just one initial potato!
- Onions
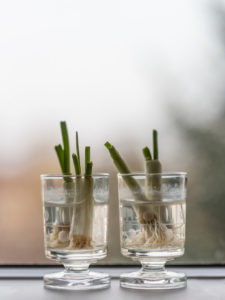
Set aside the lower third of an onion bulb (where the roots grow and about 1-2 inches of the onion itself) to dry for a few hours to a couple days, depending on the humidity levels where you live. When you notice a subtle curling or shriveling of the onion layers, it’s ready! Use a well-draining potting soil and container to plant your onion. At least 1 inch of the onion should be covered in soil that is evenly watered, and the pot should be in a south or west-facing window with good sunlight! Make sure that the soil stays moist and you should begin to see new green shoots poking up. Trim off the greens with scissors to use when cooking! Alternatively, stand the bulbs in a small jar with the root-end down. Pour in enough water to fully submerge the roots. Place jar on a windowsill, making sure the roots stay moist. Change the water weekly. Plant them once the shoots are 4-5 inches long, cutting off what you need as they will keep growing from the cut end.
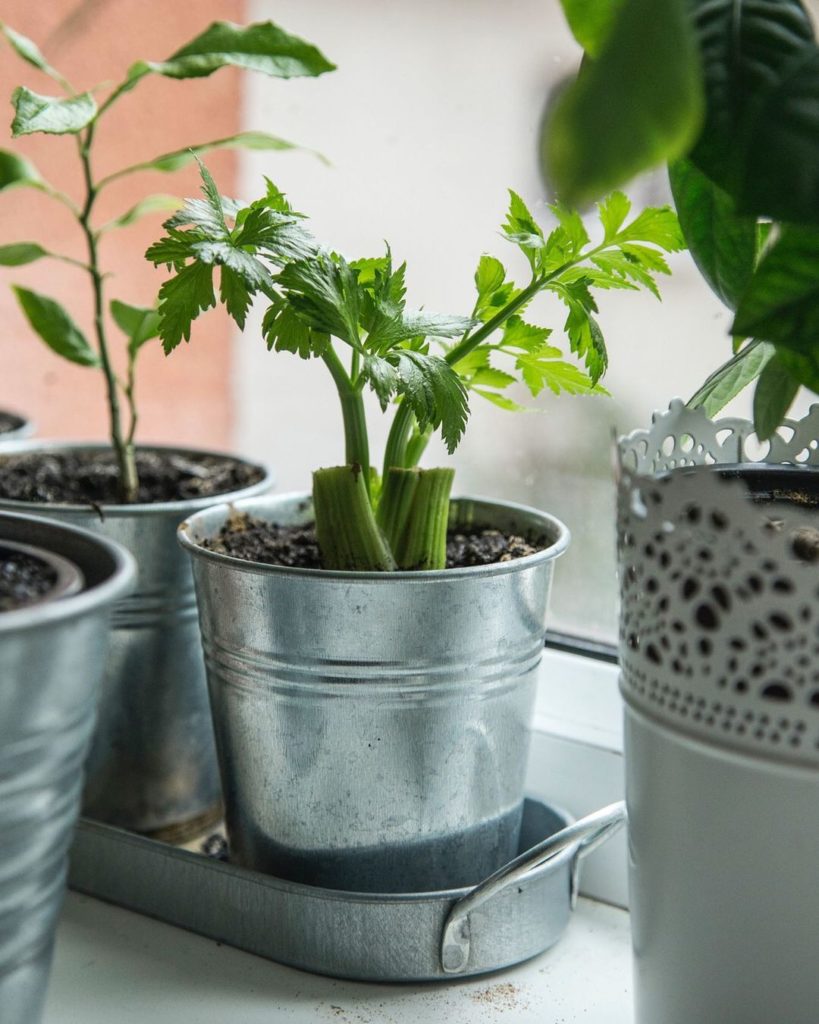
- Celery
Slice off the end of the celery bunch, about 2 inches from the root. Insert 4-5 equally spaced out toothpicks around the celery. (The toothpicks will help suspend the celery in the water to avoid it from touching the bottom of the bowl.) Add enough water into a jar or shallow glass bowl to submerge at least one inch of the plant root, and store in a place where it will receive natural light for several hours each day. After just a few days, you should see small leaves beginning to sprout from the center of the top; and after a week, you should see tiny stalks growing, as well as more leaves and small roots. When the roots are an inch long in size, you’ll want to then replant the celery in a pesticide-free potting soil (or in your garden!) The hole should be big enough to firmly hold the plant from the root end up to where it was initially cut. Fill the soil back in and make sure that the leaves and stalks are exposed above the soil.